Camera Guides
DJI Osmo Action Underwater Guide: Housing, Filters and Settings
How to set up a DJI Osmo Action for diving — the depth sensor, 20 m native rating, 60 m housing, color filters, settings, and how it compares to a GoPro.
- Brand
- DJI
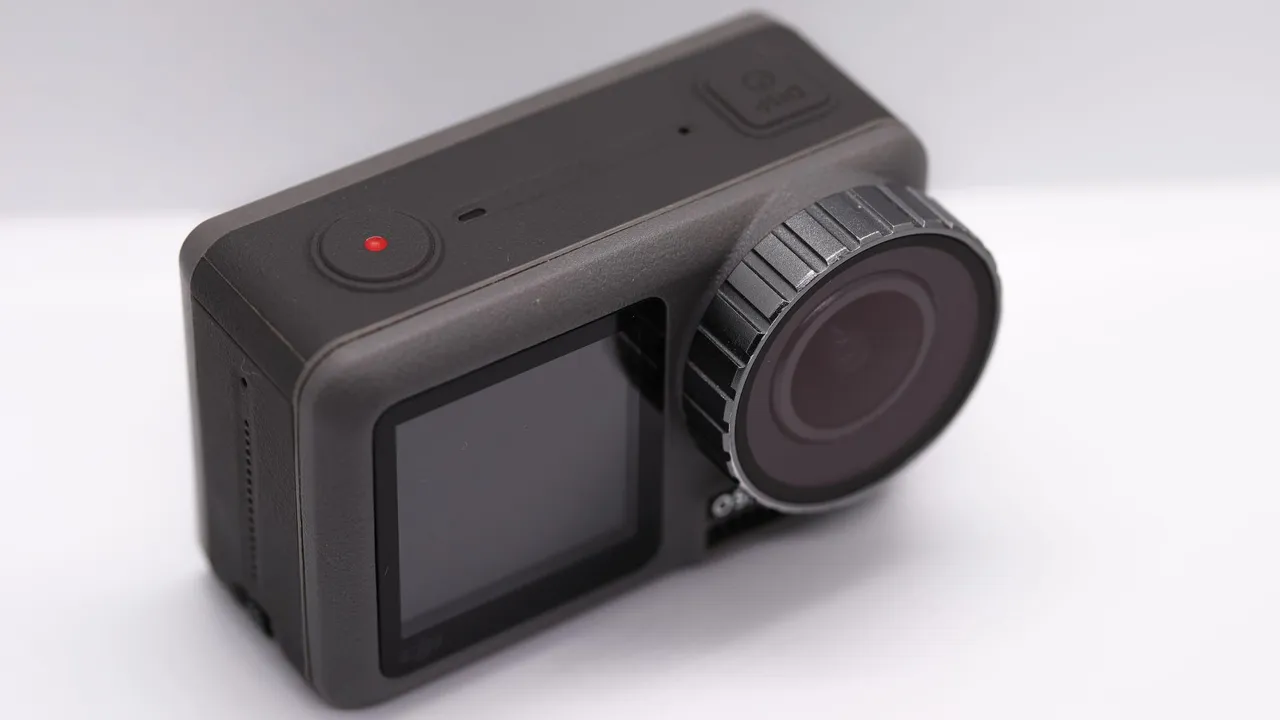
The DJI Osmo Action is the main rival to the GoPro underwater, and for a lot of divers it is the better choice. It shares the action-camera formula — small, tough, wide, and stabilized — but adds two things that matter below the surface: a larger sensor that copes better with dim light, and a set of features built with divers in mind, including a native depth rating deep enough to skip a housing on shallow dives and an on-screen depth readout.
This guide is the gear-and-setup side of shooting a DJI Osmo Action underwater: how deep it goes, the housing and accessories that matter, the settings to dial in, and how it stacks up against a GoPro. For the color and editing side in depth — white balance, and how to fix footage that still turns blue — see our companion guide to DJI Action underwater color correction.
Is the DJI Osmo Action good for diving?
For video, yes — and it is arguably the strongest action camera in the water right now. Its advantage over a GoPro comes down to the sensor: a larger sensor gathers more light in the dim, low-contrast conditions below the shallows, so footage holds up better as you descend, and DJI’s automatic white balance recovers a genuinely useful amount of warm color on its own. Add a built-in depth sensor and a strong magnetic mounting base, and it is clearly designed with divers in mind.
Its limits are the usual action-camera ones. The lens is fixed and wide, so you cannot zoom or focus close without help, and for stills it is held back by that fixed focus and the lack of an external strobe. The current lineup is the Osmo Action 5 Pro and the newer Osmo Action 6; recent models share the same underwater accessory approach, so most of this guide applies across them.
Waterproofing and housings
A recent Osmo Action is waterproof to about 20 metres (66 feet) with no housing at all — deeper than most action cameras, and enough that a lot of divers shoot shallow reef and snorkel trips on the bare camera. Past that, you need a dive housing for the pressure, and for the option to add filters and lenses.
DJI’s own Underwater Housing takes the camera to 60 metres (197 feet); the current design fits the Osmo Action 3, 4, and 5 Pro, with a separate case for the Osmo Action 6, both to the same 60-metre depth. DJI also sells a Diving Accessory Kit that bundles the 60-metre case with a floating handle, a locking screw, and anti-fog inserts, which is a tidy starting point. For deeper or more demanding diving, aluminium housings from specialists such as Carbonarm go well past recreational limits — some to 250 metres.
As with any rig, the seal is everything: check the O-ring and sealing surfaces are clean before every dive, close the housing in cool, dry air to limit fogging, and rinse the whole thing in fresh water afterward.
The built-in depth sensor and dive features
The feature that sets recent Osmo Action models apart underwater is the depth sensor. On the Action 5 Pro it shows your real-time depth on the screen as you dive and flashes an alert as you approach the camera’s rated limit — a handy reference on a snorkel or free dive, and a genuine novelty among action cameras. The magnetic quick-release base also makes it fast to clip on and off a tray or mount with gloved hands.
One important caveat: the depth sensor reads pressure through the camera body, so it is disabled once the camera is sealed inside the waterproof housing. If you dive the housing beyond the bare camera’s 20-metre rating, you will be logging depth from your dive computer instead.
Essential underwater accessories
The Osmo Action ecosystem is smaller than GoPro’s, but the essentials are all there:
Color-correction filters
DJI’s auto white balance does a lot, but on natural light past a few metres a red filter still lifts color in blue water, and a magenta filter suits green coastal water. Magnetic filter sets snap onto the housing and let you swap or park filters on a dive, and M67 thread adapters open up third-party filters and wet lenses. The one firm rule carries over: never run a filter and a video light together, or the color over-corrects toward orange.
A tray, handles and arms
Handheld footage wobbles. A tray with one or two handles is far steadier and gives you mount points for lights. Ball-and-clamp arms aim precisely and can carry floats to offset the weight of lights, and are the better long-term choice over simple flex arms.
Video lights
Below the depth where filters run out, or any time you shoot close, a video light restores full-spectrum color that no filter can bring back at depth. Two lights fill a wide scene evenly; one suits macro. Take the filter off whenever the lights go on.
A close-up or wide wet lens
Through an M67 adapter on the housing, you can add a close-up wet lens to shoot macro — the fixed lens cannot focus near on its own — or a wide wet lens for bigger reefscapes.
Anti-fog inserts and a floaty
Anti-fog inserts inside the housing soak up the moisture that would otherwise fog the port on a temperature change, and a floaty grip plus a wrist lanyard keep the camera from sinking if it comes loose. A floating extension pole — DJI’s own telescopic pole is a favourite — is a handy one-handed alternative to a tray for action-cam divers, and a coiled anti-loss lanyard clipped to a BCD D-ring is cheap insurance against a lost camera.
Best settings for underwater
The full reasoning — especially around white balance — is in the color-correction guide; in short:
- Color profile: Normal. Ready-to-use color. D-Log M records a flat 10-bit file with more grading latitude but needs a LUT to look right, so unless you grade every clip, stay on Normal.
- White balance. DJI’s auto white balance is good in shallow, stable light. In deeper or changing water, lock it and warm it to counter the blue.
- Resolution and frame rate: 4K at 60fps is the reliable all-rounder; drop to 30fps in low light so the image brightens, and use higher frame rates for slow motion.
- Stabilization: RockSteady on (or HorizonSteady for a level horizon). It crops the frame slightly, which is a fair trade.
- Photos: shoot RAW on models that support it, for the most latitude when correcting color.
Set these up as presets before you seal the housing so you are not fighting the buttons underwater.
A dive-ready preset
If you would rather copy a starting point than dial one in from scratch, this is a solid all-round dive configuration on a recent Osmo Action:
- Resolution and frame rate: 2.7K at 50fps. 2.7K is plenty sharp underwater and far kinder to your card and battery than 4K; shooting 50fps rather than 60 also sidesteps flicker under artificial light. Step up to 4K if you want the extra detail.
- Stabilization: RockSteady.
- Field of view: Standard. The wide setting stretches the corners, while Standard keeps a natural, undistorted frame.
- Exposure: −0.3 EV in bright shallow water to protect the highlights, nudging up toward +0.3 EV as it gets dim and deep.
- ISO: 100–3200, Auto. Let it float within that range so the picture stays bright without piling on noise.
- White balance: Auto (AWB). DJI’s is strong enough to leave on Auto in most conditions.
- Color: Normal (10-bit) for footage that is ready to use, or D-Log if you plan to grade every clip for maximum latitude.
- Tone: Neutral.
The Osmo Action 6’s variable aperture
The newest model adds something no other action camera has: a variable aperture, adjustable from roughly F2 to F4, which gives you real control over exposure and depth of field underwater without touching ISO or shutter. A good Action 6 dive baseline is 4K at 60fps in 16:9, a wide field of view, Auto exposure and white balance, Normal 10-bit color with the tone curve turned off, and RockSteady on; switch on the grid lines to help level your framing. Divers coming from the Action 4 or 5 Pro report a clear step up in sharpness and color richness, making it the best DJI action camera for diving so far. Insta360’s Ace Pro 2 is its closest rival for underwater color — see our Insta360 underwater guide for that side.
DJI Osmo Action versus GoPro
The honest comparison comes down to two priorities. The DJI’s larger sensor and stronger auto white balance give it the edge in low light and in out-of-camera color, and its depth sensor is a nice dive-specific bonus — so if image quality straight off the camera matters most, it leads. GoPro’s advantage is its ecosystem: a wider range of dive filters, wet lenses, and third-party housings, plus swappable Lens Mods on land. If you want the most accessory choice, GoPro wins. Both make excellent underwater video; the fuller gear picture for GoPro is in our GoPro underwater guide.
Common problems and fixes
- Flat, blue, or washed-out footage. Even with DJI’s good white balance, deep or distant shots lose warm color. Add a filter for natural light, a light for close or deep work, and correct the rest afterward — the method is in the color-correction guide.
- Fogging inside the housing. Use anti-fog inserts, seal the case in cool, dry air, and let it acclimatize before entering.
- Short battery life in cold water. Carry spare batteries and keep them warm before a dive.
- Backscatter — specks in the frame. Keep light off the water directly between the lens and your subject, angle lights out to the side, and get closer.
- No depth readout in the housing. Expected — the sensor is disabled inside the case, so use your dive computer.
- A dropped or lost camera. A wrist lanyard and a floaty grip are cheap insurance.
Getting your color back
Even with DJI’s strong auto white balance, footage usually benefits from a color pass at home. DJI’s own Mimo app has a one-tap underwater-enhancement mode that rebuilds natural color from a clip before you touch anything else; a common finish after that is to pull the highlights and shadows down a little, lift the saturation, and add a touch of sharpness. Our guide to the best underwater photo editor compares the options, and how to restore underwater photos walks through the methods. For a one-tap route on your phone, our app JellyFix restores DJI photos on-device, and you can see the kind of color that comes back in the before-and-after gallery. For a diver’s take on the camera itself, DIVEIN’s Osmo Action 5 Pro review is a useful read.
For more camera setups, browse the camera guides, and for the wider picture of underwater imaging, explore OceanDimana.
Field notes
Frequently asked questions
Is the DJI Osmo Action good for diving?
How deep can a DJI Osmo Action go underwater?
Does the Osmo Action show depth underwater?
Do I need a filter for a DJI Osmo Action underwater?
Does the DJI Osmo Action shoot RAW?
Which is better for diving, DJI Osmo Action or GoPro?
How do I change settings while it is in the housing?
What settings should I use on a DJI Osmo Action underwater?
How do I color-correct DJI underwater video in the Mimo app?
Does the Osmo Action overheat or struggle with battery underwater?
Keep exploring
Continue exploring
DJI Action Underwater Color Correction
The companion guide — camera settings, white balance, and how to restore natural color from DJI footage.
Read moreGoPro Underwater Guide
The gear-and-setup guide for the DJI's main rival — housings, filters, lenses, and settings.
Read moreWhy Underwater Photos Look Blue
The science behind the blue-green cast, and why water steals warm color with depth and distance.
Read moreHow to Restore Underwater Photos
Every way to bring natural color back, from in-camera technique to AI.
Read more