Camera Guides
GoPro Underwater Guide: Housings, Filters and Best Settings
How to set up a GoPro for diving — waterproof housings, color-correction filters, macro and wide lenses, video lights, and the best underwater settings.
- Brand
- GoPro
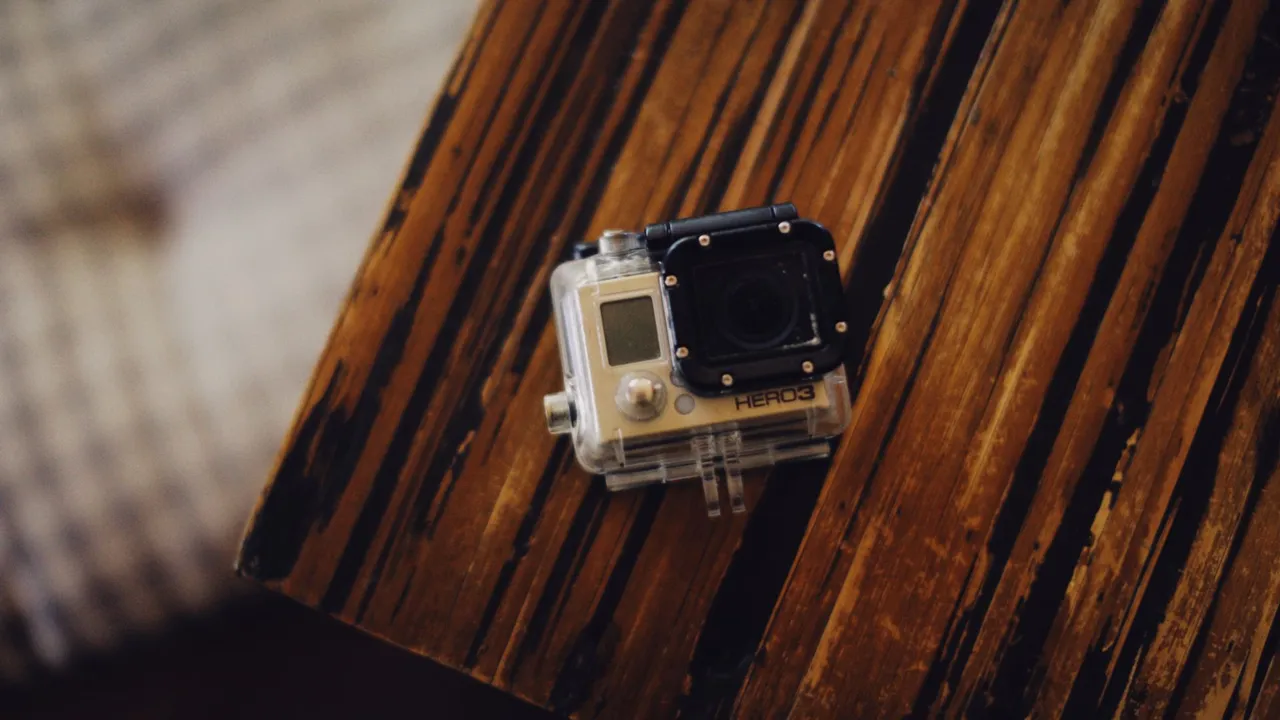
For a huge number of divers, the first camera to go underwater is a GoPro. It is small, tough, waterproof out of the box to snorkel depth, and cheap enough that losing it on a reef would not end the trip. It shoots genuinely good 4K video, and once it is set up properly it holds its own against far more expensive rigs for wide-angle clips. But getting there takes more than dropping it in the water — a GoPro underwater needs a housing for depth, filters for color, and a lens for anything small.
This guide is the gear-and-setup side of shooting a GoPro underwater: which models to use, how deep they go, the accessories that actually matter, and the settings to dial in before a dive. For the color and editing side in depth — why footage turns blue and how to correct it — see our companion guide to GoPro underwater color correction.
Is a GoPro good for underwater?
For video, yes, with a caveat or two. A GoPro’s strengths underwater are its size, toughness, wide field of view, and effective stabilization, which together make smooth, immersive wide-angle footage easy to capture. Its weaknesses come from the same small, simple design: a small sensor that struggles in the dim light below the shallows, and a fixed-focus lens that cannot zoom or focus close on its own.
For stills it is more limited. A GoPro is a video camera first, and its fixed focus point and inability to trigger an external strobe hold it back for serious photography — more on that below. As an easy, rugged video camera for reefs, wrecks, and big animals it is hard to beat for the money; as a dedicated stills camera, it has real limits. Recent HERO Black models — roughly the HERO9 through the current HERO13 Black — share the same underwater accessory ecosystem, so most of this guide applies whichever of those you own.
Waterproofing and housings
A modern GoPro is waterproof to 10 metres (33 feet) with no housing at all, which covers snorkeling and shallow reef. Past that you need a dive housing — both for the pressure and because a housing is what lets you mount filters and lenses.
The standard option is GoPro’s own Protective Dive Housing, rated to 60 metres (196 feet) and compatible with the HERO9 through HERO13. As well as protecting the camera, it is the mount point for the popular FLIP filter system and for wide-angle wet lenses, so most divers who shoot filters own one. For deeper diving, more durability, or the ability to add better ports, aluminium housings from makers such as Isotta and Recsea go well beyond recreational depths — some past 100 metres — at a higher price.
Whichever housing you use, treat the seal as the whole game. Check the O-ring and sealing surfaces are clean and free of sand or hair before every dive, close the housing in cool, dry air to reduce fogging, and rinse the whole rig in fresh water afterward. A flooded housing is the most common way a GoPro dive ends early.
Essential underwater accessories
A bare GoPro in a housing works, but a few accessories make the difference between usable clips and footage you are proud of. In rough order of importance:
Color-correction filters
The single most useful add-on. A GoPro has no underwater white-balance mode that can rebuild the warm colors water strips out at depth, so without help the footage turns cyan and flat. A red filter over the housing port restores those tones using natural light. Systems like FLIP use a flip-up design with different filters for different conditions — a shallow or all-round DIVE filter, and a DEEP filter for lower, dimmer water — plus green-water versions for coastal sites. Filters do their best work down to roughly 24 metres (80 feet); below that there is too little light for the sensor to work through the filter, and you switch to lights. One firm rule carries over from every color guide: never run a red filter and a video light together — the light already provides full-spectrum color, and the filter will push everything orange.
A macro or close-up lens
A GoPro’s fixed-focus lens goes soft on anything closer than about 30 centimetres (12 inches), which makes small subjects impossible on the bare camera. A screw-on close-up wet lens — a +10, or the stronger +15 MacroMate Mini — moves the focus point in close so you can fill the frame with a nudibranch or a shrimp. The catch is a very shallow working distance of about an inch, so these lenses come with a focus stick that sets the exact distance; get closer or further and the shot goes soft.
A wide-angle wet lens
For reefscapes and big animals, a wide wet lens such as the Backscatter Sharp Wide Lens Pro widens the field of view to around 140 degrees, sharpens the corners, and lets you focus closer — and it can be paired with a color filter. It is an optional upgrade rather than a must-have, but it noticeably lifts wide-angle footage.
A tray, handles and arms
Handheld GoPro footage wobbles. A tray with two handles is far steadier than a selfie stick or a bare camera, and it gives you somewhere to mount lights. Lighting arms come in two types: simple flex arms, and ball-and-clamp arms, which are more stable, aim precisely, and can carry floats to offset the weight of lights. Ball arms are the better long-term choice.
Video lights
Below the depth where filters run out, or any time you shoot close and want true color, a video light is the answer. A light held near the subject restores full-spectrum color that no filter can bring back at depth. Two lights evenly fill a wide-angle scene; a single light suits macro, optionally with a snoot to spotlight a subject and darken the background. Remember to take the filter off whenever the lights go on.
Anti-fog inserts and a floaty
Two cheap items that save dives. Anti-fog inserts sit inside the housing and soak up the moisture that would otherwise fog the port on a temperature change. A float — a foam grip or floaty backdoor — keeps the camera at the surface if it comes loose, and a wrist lanyard stops it heading for the bottom in the first place.
Best GoPro settings for underwater
You can spend a long time in the GoPro menus; these are the settings that matter underwater. For the reasoning behind the white-balance choices in particular, the color-correction guide goes deeper.
- Turn on Pro controls. The simplified Easy mode hides the settings you need; switch to Pro.
- Profile: Standard (Natural). Ready-to-use color. Log records a flat file for grading and HDR needs a special monitor, so unless you grade every clip, stay on Standard.
- Resolution and frame rate: 4K at 60fps is the reliable all-rounder, with 5.3K for extra detail if your computer can handle it. Drop to 30fps in low light so the shutter slows and the image brightens; use 2.7K or 1080p at 120–240fps for slow motion.
- Digital lens: Wide. Avoid SuperView and HyperView underwater, which distort heavily. Use Linear, zoomed slightly, for macro.
- HyperSmooth: on. The stabilization is excellent; it crops the frame a little, which is a fair trade.
- Protune: 10-bit, high bit rate, shutter Auto, EV −0.5, ISO Auto, sharpness Low, color Natural. With a filter fitted, leave white balance on Auto — it handles filtered light well. Auto ISO generally gives cleaner results underwater than a fixed cap, because the light shifts constantly with depth.
- Photos: shoot RAW. For stills, set the output to RAW — a GoPro saves it as a .gpr file — for the most latitude when correcting color later.
Set these up as named custom presets — a wide-angle one, a macro one, a slow-motion one — so you can switch between them on a dive without digging through menus. The dive retailer Backscatter maintains a detailed GoPro HERO13 underwater settings guide with a downloadable cheat sheet if you want a reference to laminate for your camera bag.
A preset for deep, low-light dives
Wrecks, caves, deep dives, and low-visibility water are where a GoPro’s small sensor struggles most, so it is worth building a second preset tuned for the gloom. Keep the same clean base — Standard profile, Natural color, Low sharpness — and adjust the rest:
- Aspect ratio: 8:7. The full-sensor 8:7 capture on recent HERO models gives you the most image to work with and room to reframe to wide or vertical afterward.
- 4K at 30fps. The slower frame rate holds the shutter open longer for a brighter image where light is scarce.
- Shutter and white balance: Auto. Let the camera track the shifting light; with a red filter fitted, Auto white balance still copes.
- ISO 100–1600. Cap the auto range with a minimum of 100 and a maximum of 1600 to keep noise in check in the dark. If you are running a video light, drop the maximum to 800 and set EV compensation to −0.5 to protect the lit highlights; with no light, leave EV at 0.
- HDR for high-contrast scenes. Inside a wreck with a bright opening behind it the dynamic range is brutal — GoPro’s HDR mode holds detail in both the blown highlights and the shadows far better than a single exposure.
Changing settings inside the housing
Here is the practical problem no one warns you about: once the camera is sealed in the dive housing, the touch screen is behind plastic and you cannot use it. The only external controls are the shutter and mode buttons, so you cannot tap through menus underwater — which is exactly why the custom presets above matter.
To switch between those presets with the housing closed, GoPro cameras have a hidden shortcut divers call the secret menu: press and hold the Mode button, then press the Record button while still holding Mode. That opens the preset list, and you cycle through it with the Mode button and select with Record. Set up your wide, macro, and slow-motion presets before the dive, and you can move between them one-handed without ever opening the housing.
Photo versus video on a GoPro
It is worth being honest about stills. A GoPro can take photos, and with a close-up lens and a light it can take good ones, but it is built as a video camera. Its fixed focus point and its inability to trigger an external strobe are real limitations for the lit, pin-sharp macro and wide-angle stills that dedicated underwater cameras produce. If your main goal is photography rather than video, a waterproof compact such as the OM System TG-7, or an entry-level mirrorless in a housing, will take you further. For video — which is what most action-camera divers actually want — the GoPro remains one of the best-value tools in the water. If you also shoot a DJI Osmo Action, our DJI Action color guide covers how that system differs.
Common problems and fixes
The issues that trip up GoPro divers, and what to do about them:
- Flat, blue, or washed-out footage. The water removed the warm color. Fit a filter for natural-light shooting, add a light for close or deep work, and correct the rest afterward — the full method is in the color-correction guide.
- Fogging inside the housing. Caused by moisture and a temperature change. Use anti-fog inserts, seal the housing in cool, dry air rather than on a hot, humid boat deck, and let the rig acclimatize before entering.
- Overheating. More a surface problem than an underwater one, since water cools the camera, but long continuous high-resolution recording can still trigger it. Recent HERO Black models with Enduro batteries handle heat better; if you hit it, drop the resolution or frame rate.
- Short battery life, especially in cold water. Cold saps action-camera batteries fast. Carry spare Enduro batteries, keep them warm before a dive, and turn off GPS and voice control, which do nothing underwater anyway.
- Backscatter — specks in the frame. Suspended particles catching light. Keep any light off the water directly between the lens and your subject, angle lights out to the side, and get closer to reduce the water in between.
- Soft, out-of-focus close-ups. The fixed lens cannot focus that near. Add a close-up wet lens and use its focus stick.
- A dropped or lost camera. A wrist lanyard and a floaty backdoor are cheap insurance against a one-way trip to the seabed.
Getting your color back
Even with a filter and good technique, GoPro footage almost always needs a color pass at home. You can correct it by hand in an editor, or use a tool built for the job. Our guide to the best underwater photo editor compares the options, and how to restore underwater photos walks through the methods. If you want a one-tap route on your phone, our app JellyFix restores GoPro photos on-device, and you can see the kind of color that comes back in the before-and-after gallery.
For more camera setups, browse the camera guides, and for the wider picture of underwater imaging, explore OceanDimana.
Field notes
Frequently asked questions
Is a GoPro good for underwater video and photos?
How deep can a GoPro go underwater?
Do I need a housing if a GoPro is already waterproof?
Do I need a filter for a GoPro underwater?
Why are my close-up GoPro shots blurry?
How do I change GoPro settings while it is in the dive housing?
What GoPro settings should I use for wrecks and low-light dives?
Does a GoPro overheat underwater?
Which GoPro is best for diving?
How do I stop my GoPro housing from fogging?
Keep exploring
Continue exploring
GoPro Underwater Color Correction
The companion guide — why GoPro footage turns blue and how to restore natural color, in depth.
Read moreWhy Underwater Photos Look Blue
The science behind the blue-green cast, and why water steals warm color with depth and distance.
Read moreHow to Restore Underwater Photos
Every way to bring natural color back, from in-camera technique to AI.
Read moreBest Underwater Photo Editor
Compare Lightroom, Photoshop, Capture One, and AI editors for underwater work.
Read more