Field guide · Underwater color
How to Restore Underwater Photos (Beginner's Complete Guide)
The best ways to restore underwater photos — white balance, Lightroom, Photoshop, and AI editors like JellyFix — with the pros and cons of each.
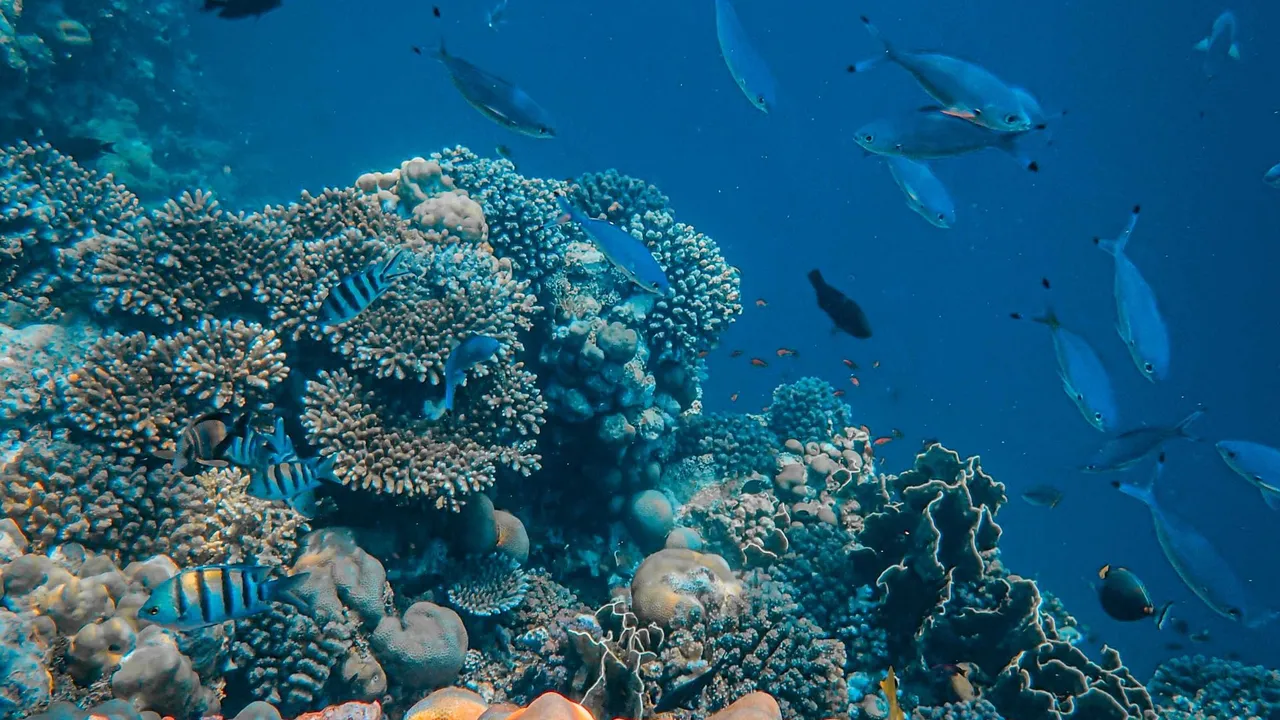
You get home from a week of diving with a camera roll full of what should be your best photos — a turtle gliding over the reef, a wall of soft coral, your buddy hanging in the blue. Then you open them on a big screen and everything is flat, blue-green, and washed out. The color you remember is nowhere to be found.
This is one of the most common frustrations in underwater photography, and the good news is that most of that color can be brought back. Before you can restore a photo well, though, it helps to know what happened to it. Water absorbs the warm end of the spectrum with depth and distance, which is why your shots drift toward blue and green — we cover the physics in detail in Why Underwater Photos Look Blue. This guide picks up where that one leaves off: now that you know why the color is gone, here is how to get it back.
There are several ways to do it, from getting the shot right in the water to correcting it later in Lightroom, Photoshop, or a dedicated AI tool. None of them is the single “best” method — the right one depends on how you shoot, how much time you want to spend, and how comfortable you are editing. We will walk through each, honestly, so you can pick the workflow that fits you.
Can Underwater Photos Really Be Restored?
Mostly, yes — but it helps to be realistic about what “restore” means.
A camera can only record the light that reaches its sensor. Water absorbs red light within the first few meters, followed by orange and yellow, so by the time you are shooting a reef across ten meters of water, very little warm light is left to record. NOAA has a clear explainer on how far light travels in the ocean and why the warm colors vanish first. Editing works by rebalancing and amplifying the information that survived in the file. When some red and orange detail is still there — even faintly — a good edit can rebuild a natural-looking image that closely matches what you saw.
What editing cannot do is invent detail that was never captured. If a color channel is essentially empty because the water absorbed it completely, no slider and no AI model can conjure it back. You will see this most on deep or distant shots: push them hard and they turn muddy, magenta, or blotchy, because there is nothing left in that channel to stretch cleanly.
So the honest summary is this. Color is usually recoverable when the shot still holds some of it, and getting close and shooting shallow gives every later step far more to work with. A photo that arrived with real information can be restored convincingly; a photo that arrived nearly empty can only be improved so far. Keep that expectation in mind and you will be pleased with your results instead of chasing color that simply isn’t in the file.
Method 1 – Shoot Correctly Before Editing
The most effective restoration happens before you ever open an editor. Every step below puts more real color into the file, which means less work — and better results — afterward.
- Get closer. The single most useful habit underwater. The less water between your lens and the subject, the less color the water can filter out. Wide-angle shooters push right up to their subjects for exactly this reason.
- Shoot RAW. RAW keeps far more color information than JPEG, which gives white balance and editing much more room. It will not recover a color the water absorbed completely, but it preserves everything the sensor did capture.
- Add light with a strobe or video light. A light held close to the subject puts full-spectrum light onto it before the water can filter anything out. This is the most reliable way to get true reds and accurate tones, especially for macro and close work. Strobes fire a burst for stills; video lights stay on and suit both photo and video.
- Set a custom white balance. Many cameras let you set white balance manually against a neutral surface at depth, which gives editing a much better starting point. It is worth learning how and when to do it on your camera.
- Use a red filter with natural light. In the top 10 to 20 meters, where some red still exists, a red or magenta filter restores warmth using ambient light. One firm rule: never use a red filter together with a strobe — the strobe already supplies full-spectrum light, so the filter over-corrects toward orange.
- Avoid backscatter. Keep your light off the column of water directly between your lens and the subject, or you will light up the suspended particles and get a snowstorm of bright specks. Moving the light out to the side is the usual fix.
If you shoot an action camera, the fixed lens makes getting close even more important, and the settings differ by model — see our GoPro underwater color correction guide for the specifics. Dive training covers this ground too; PADI’s Digital Underwater Photographer course is built around a shoot-examine-adjust routine for getting light and distance right in the water.
Good capture always beats editing, because it is the only step that adds information. Everything after this point can rebalance what you have; none of it can replace what the water removed.
Method 2 – Restore Colors with Lightroom
For most people, Adobe Lightroom is the sweet spot for underwater editing: capable enough to fix serious color casts, organized enough to handle a full trip, and approachable once you learn a handful of tools. Adobe’s own documentation on image tone and color is a good reference for the controls below.
Here is the order most underwater editors work in:
- White balance first. The Temperature and Tint sliders do the heavy lifting. Warm the image to counter the blue, and use Tint to correct the green-to-magenta axis. The eyedropper is faster if you have anything neutral in the frame — sand, a grey rock, a dive slate.
- HSL for the leftover cast. The Hue, Saturation, and Luminance panel lets you rescue specific colors — bringing back blues without over-saturating everything, or taming a cyan that white balance alone can’t neutralize.
- Dehaze for backscatter and murk. Dehaze cuts through the low-contrast veil that suspended particles leave behind. Use it gently; too much looks harsh and crunchy.
- Curves for contrast and depth. A subtle S-curve restores the contrast that water flattens, and the individual red, green, and blue channels in the Curves panel give you fine control over the remaining color balance.
- Masking for local fixes. Lightroom’s masking lets you correct part of the frame — warming a foreground subject while leaving the blue water alone, for example.
Pros: genuinely capable color correction, non-destructive edits, excellent library and batch tools for a whole trip, reusable presets. Cons: a learning curve, a subscription, and it is easy to overcook an image before your eye is trained. Difficulty: Moderate. You can get a good result with white balance and dehaze in a couple of minutes; mastering the rest takes practice. Best for: divers who edit regularly, want full control, and are processing many photos from a trip.
Method 3 – Photoshop
Photoshop overlaps with Lightroom — both share the same Camera Raw engine for color and tonal adjustments — but it earns its place when a photo needs work that global sliders can’t do.
Reach for Photoshop when you need:
- Precise local adjustments. Local tools in Camera Raw and Photoshop’s layer masks let you treat different parts of an image separately — a common need underwater, where a foreground subject and the background water want completely different corrections.
- Advanced masking and compositing. Selecting a subject cleanly, blending exposures, or fixing an uneven strobe falloff is far easier with layers.
- Removing backscatter. Spot healing, the clone tool, and content-aware fill can paint out the specks that dehaze can’t remove, one at a time.
Pros: the most control of any option, pixel-level retouching, and the ability to fix problems no other tool can touch. Cons: the steepest learning curve here, overkill for routine color correction, slow for large batches, and a subscription. Difficulty: Advanced. This is a tool for specific problems, not your everyday first stop.
For most divers, Photoshop is the specialist you call in occasionally — after Lightroom or an AI tool has done the bulk of the work.
Method 4 – AI Underwater Restoration
A newer option is software built specifically to undo the color shift that water causes. Instead of asking you to move a dozen sliders, these tools model how water absorbs color across the frame and rebuild a natural-looking result — often in a single step.
The appeal is real:
- It estimates the shift for you. A model trained on underwater images can judge how much warm color was lost and rebalance accordingly, which is hard to do by eye when you are new to editing.
- One-click workflow. For many photos, you open the image and you are done. That is a large time saving over manual editing.
- Consistency. Applied across a whole dive, an AI tool tends to give you a coherent look rather than the drift you get correcting each shot by hand.
- Speed. Batch a full trip and get usable results in minutes.
The honest limitations are the same ones that apply to every method. AI works best when the photo still holds some color detail; on badly washed-out shots it recovers less, and it cannot invent a channel that was never recorded. Results also vary between tools — some over-warm skin tones or leave an artificial look — so it is worth comparing a few. We keep an ongoing rundown in our best underwater photo editor comparison.
Used well, AI restoration is the fastest route from a blue photo to a natural one, and for a lot of divers it is all they need.
When JellyFix Makes Sense
JellyFix is our own take on AI restoration, built specifically for underwater photos. We would rather tell you where it fits than claim it beats everything else — because which tool is “best” genuinely depends on how you work.
JellyFix makes the most sense if you:
- Want to restore photos on your phone. It runs on-device, so the processing happens on your iPhone or Android without uploading anything.
- Don’t have, or don’t want, a signal. Because it works offline, you can restore shots on the boat or in a remote lodge with no internet at all, and your images never leave your device.
- Would rather not edit. It is built around one-tap restoration for divers who want their color back without learning Lightroom or paying a subscription.
- Shoot on action cameras and compacts. It is tuned for the kinds of files most divers actually capture.
Where JellyFix is not the answer: if you want frame-by-frame retouching, compositing, or the last ten percent of manual control, a full editor like Lightroom or Photoshop will take you further. Plenty of divers use both — JellyFix for a fast, consistent first pass, and a desktop editor for the occasional shot that deserves extra attention. You can see the kind of results it produces in our before-and-after gallery, and read more about the app on the about page.
The Methods Compared
No single method wins on every count. Here is how they stack up on the things that matter most when you are deciding.
| Method | Learning Curve | Time Required | Batch Editing | Natural Results | Best For |
|---|---|---|---|---|---|
| Manual white balance | Low | Fast per shot | Limited | Good in the top 10–20 m | Getting color right in the water |
| Lightroom | Moderate | Moderate | Yes | Very good with practice | Divers who edit regularly and want control |
| Photoshop | High | Slow | No | Excellent on problem shots | Precise retouching and backscatter removal |
| AI editors | Very low | Very fast | Yes | Good to very good | Fast, consistent color with little effort |
| JellyFix | Very low | One tap | Yes | Good, tuned for underwater | On-device, offline restoration on your phone |
Finding Your Workflow
There is no single best way to restore underwater photos. The right method depends on your experience, the time you want to spend, the gear you shoot with, and how much you enjoy editing.
If you are just starting out, the highest-value move is to shoot better: get closer, shoot RAW, and add light where you can. From there, an AI tool or a few minutes in Lightroom will handle most of your color. Keep Photoshop in reserve for the shots that need real surgery, and reach for a full manual workflow when you want complete control over a photo you care about.
The best way to settle on a workflow is to try a few on the same set of photos and compare. Run a batch through an AI restorer, correct one by hand in Lightroom, and see which gets you to a result you are happy with in the time you are willing to spend. Most divers land on a mix — and that is exactly right. For more on the science and technique behind all of this, browse the guides on OceanDimana.
Field notes
Frequently asked questions
Can underwater photos really be restored?
Does Lightroom work for restoring underwater photos?
Can AI recover the missing colors in underwater photos?
Is RAW necessary to restore underwater photos?
Which underwater photo editing software is easiest for beginners?
Why do edited underwater photos sometimes look fake?
Does JellyFix work offline?
Which restoration method is fastest?
Can you restore underwater photos on your phone?
Do you need expensive software to fix underwater photos?
Underwater color science
Continue Learning
Why Underwater Photos Look Blue
The science behind the blue-green cast, and why water steals warm color with depth and distance.
Read moreBest Underwater Photo Editor
Compare the most popular underwater editing tools and find the workflow that suits your diving.
Read moreDJI Action Underwater Color Correction
Camera settings, shooting technique, and editing workflows for better color from DJI Action cameras.
Read moreGoPro Underwater Color Correction
How to get better color out of underwater footage and photos shot on a GoPro.
Read more