Field guide · Underwater color
Underwater Macro Photography: Focus, Composition and Light
A complete guide to underwater macro — nailing focus and sharpness, choosing your angle, composing with color and the environment, and lighting tiny subjects.
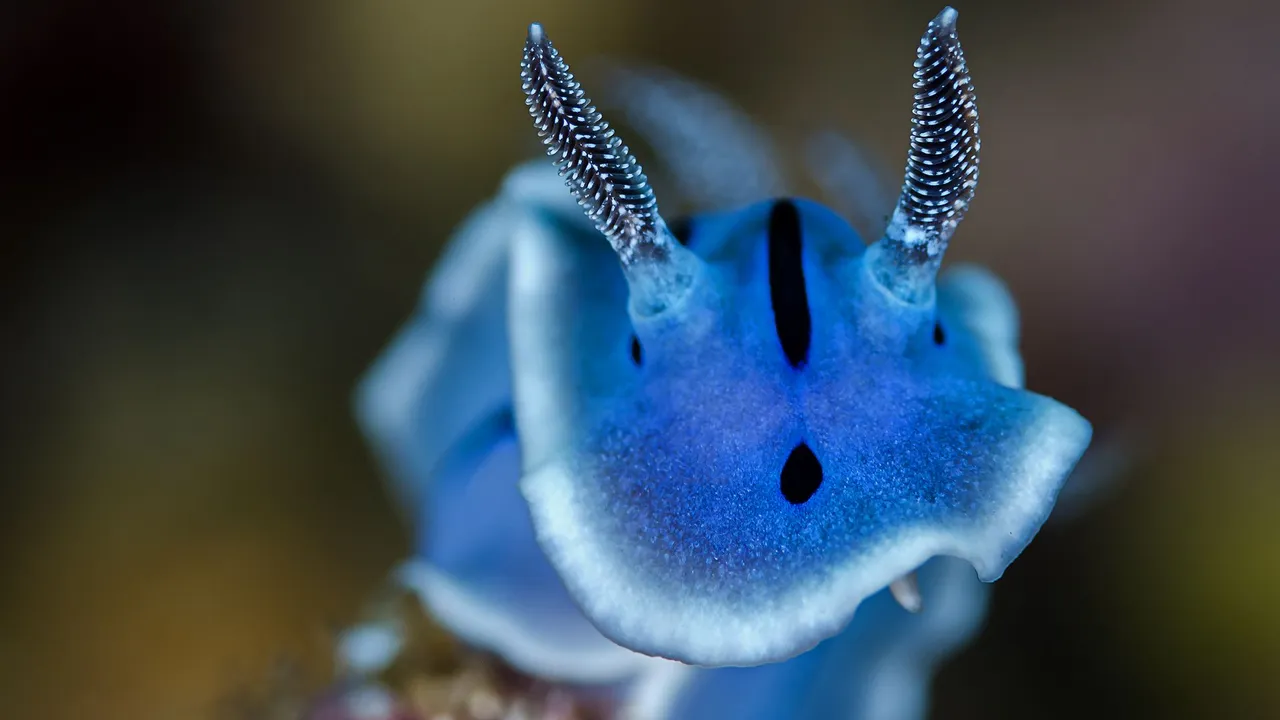
Macro is a different craft from the rest of underwater photography. Wide-angle is about light and scale; macro is about getting a creature the size of a fingernail pin-sharp, from exactly the right angle, set against color that makes it sing. The gear gets you close — a camera that focuses within a centimetre, a wet lens, a light — but the gear is the easy part. What separates a snapshot of a nudibranch from a photograph of one is technique, and it comes down to four things: focus, angle, composition, and light.
This guide assumes you already have a macro-capable setup. If you do not, the OM System TG-7 with its Microscope mode and a close-up wet lens is the classic entry rig, and a mirrorless camera with a macro lens in a housing is the step up; the camera guides cover the options. With that sorted, here is how to actually take the shot.
Start with the eye: focus and sharpness
Everything in macro begins with one rule: focus on the eye. To see why, it helps to understand two ideas. When the camera focuses, there is exactly one slice of the scene that is perfectly sharp — the focal plane. The zone in front of and behind it that still looks acceptably sharp is the depth of field, and the shallower it is, the less of the subject is sharp. At macro magnifications that zone is paper-thin. There is only ever one focal plane, and the one thing you control is where it lands. Put it on the eye. Even when the whole creature sits within the depth of field, a focus point that drifts to the body instead of the eye visibly drains the life and precision out of the image.
It helps to know how the camera finds focus. A contrast-detect spot-AF system nudges the lens back and forth, measuring the contrast under the focus box, and locks the instant that contrast peaks — the green box or light you see. The practical consequence is simple: the focus box has to sit precisely on the eye, not near it.
Then comes the moment that frustrates every new macro shooter — the camera confirmed focus, and the photo is still soft. Locking focus only fixes the sharp plane for that instant. The lens position is now fixed, so if anything changes the distance between camera and subject — you drifting on a surge, the animal shifting, a few millimetres either way — the plane slides off and the focus is gone. On top of that, a shutter that is too slow or a depth of field that is too shallow will blur the shot regardless.
The fix is a fast, disciplined rhythm: compose, put the box on the eye, wait for the lock, and shoot immediately. Do not linger studying the screen to admire the shot — every extra second is another chance to drift out of focus. The shorter the gap between the lock and the shutter press, the higher your keeper rate. Back that up with a fast shutter, around 1/160 to 1/250 to freeze micro-movement, a slightly smaller aperture for a sliver more depth of field, and a steady position — good buoyancy, and where the environment allows it, a fingertip resting on bare substrate to stop yourself moving.
Get low, and choose your angle
Most macro subjects live on or near the bottom, and the instinct is to shoot down at them. Resist it. Shooting down gives a flat, top-down look with a distracting carpet of sand behind the subject. Getting down to the creature’s own level is what gives a macro shot dimension and a clean background. From there, three angles cover almost everything:
- Front-on maximises expression and eye contact — the “big face” look that creates a sense of the animal meeting your gaze. It suits characterful subjects like frogfish, pufferfish, and boxfish. Its limit is depth: a pure front view is flat and shows no sense of the body’s thickness.
- Side-on shows the full outline, so it is the angle for subjects defined by their silhouette — seahorses, shrimp, anything with a distinctive shape or a parasite worth showing. Its limit is the reverse: you lose the face and its expression.
- Three-quarter, roughly 30 degrees off the front, is the macro workhorse, because it covers the face and the side at once for the best three-dimensionality. It comes in two flavors: lean toward the front to lead with expression while keeping some contour, or lean toward the side to lead with contour while keeping some face — the latter is a favorite for shrimp.
The one-line version: shoot front-on for interaction, side-on for contour, and three-quarter when you want both and a sense of depth.
There is a practical catch to getting truly low. On the sand, your housing, port, and strobe arms hold the lens a few centimetres above the bottom, so even with the rig laid flat you are still shooting slightly downward — and if the subject is shorter than that gap, you cannot reach eye level just by putting the camera down. Three fixes help. Push the lens forward and in close to enlarge the subject and flatten the angle. Pivot the rig forward on its front edge to tilt the view down toward level, so the creature’s own body screens the sand behind it — but do not over-tilt, or you are back to a top-down shot; a subject that is lifting its head slightly is ideal. Best of all, when you can, shoot subjects that sit up on a rise or a piece of coral, which removes the height gap at its source.
Fish faces deserve a note of their own. For gobies, frogfish, pufferfish, and eels, the expression lives in the eyes and mouth. Prioritise a sharp mouth even if you cannot get both eyes in focus, and a slight upward angle from a low position both reduces the sand in frame and lends the fish an imposing, looking-up presence.
Compose with the environment, not just the subject
The biggest leap from a snapshot to a photograph is to stop treating the background as empty space. The environment is part of the composition, not a blank behind the subject. The clearest way to feel this is to picture the same candy crab shot three ways: “a candy crab on the coral” makes the crab the story; “the coral and the candy crab” tells a story of symbiosis; “a candy crab in a sea of coral” is all atmosphere. Same animal, three completely different photographs — decided only by how much environment you include.
Color is the engine of that choice, and there are three environments worth shooting:
- Analogous — subject and surroundings sit next to each other on the color wheel (yellow and orange, blue and purple, yellow and green). The result is harmonious, clean, and forgiving; it is the most restful to look at and the easiest to get right.
- Complementary — subject and surroundings sit opposite each other, or far apart (yellow and purple, blue and orange, red and green). The high contrast makes the subject leap off the frame.
- Monochrome — the frame trends toward a single hue, with no color contrast to lean on. It is minimal and refined, but because it relies entirely on light and shadow for its depth, it is the hardest to light well.
How much of the frame each color occupies then sets the story. A subject that dominates the frame — 70 per cent or more — tells a story about the creature and its detail. A roughly even split speaks to the animal and its habitat together. And a small subject in a large field of color is pure mood, the environment carrying the feeling while the subject anchors the eye.
Two habits sharpen any macro composition. Leave space in the direction the subject faces or moves — a nudibranch reaching to the right wants empty room to its right, and the path your eye imagines gives the still image motion. And favor diagonals and curves: a body set on a diagonal feels more dynamic than one laid flat along the horizontal, and the ruffled curve of a nudibranch’s mantle adds flow. You do not have to fit the whole animal in, either — cropping to the most expressive part, a head and a frill rather than the entire body, concentrates the image. Before you commit to a shot, ask two questions: is this color environment worth shooting, and do I want the subject or the environment to lead?
Light it
Compose first, then light — never let the position of a light talk you into a worse angle. Once you have your framing and your angle, bring the light in to match. For the three-quarter workhorse angle, that means lighting from the side or obliquely, so both the face and the side are lit and the subject gains dimension; flat front-lighting kills the very depth the angle was chosen for. Side and edge light sculpt; front light flattens.
The black-background look that defines so much macro is an exposure trick, not an editing one. Meter on the lit subject — switch on spot metering so exposure follows the subject rather than the dark frame, and dial in negative exposure compensation — then use a fast shutter and a small aperture so the ambient water is recorded as black. Light only the subject, keeping the beam off the water and the background; a snoot, which narrows the light to a small circle, gives the cleanest black of all. The same discipline keeps backscatter down: angle the light so it does not blast the particle-filled water directly between your lens and the subject, and light from the side or above rather than straight on.
A note on the gear, and on the reef
None of this needs an expensive rig. A camera that focuses tiny and close, a single strobe or focus light, and steady buoyancy will out-shoot a bigger, clumsier setup every time; the OM System TG-7 guide walks through a concrete entry-level macro configuration. What matters far more than megapixels is the discipline above — the eye in focus, the low angle, the considered background, the matched light.
One last thing, because macro tempts you to get close: get close to the subject, never at the expense of the subject. Mind your fins, keep your gauges off the reef, and do not touch, move, or crowd an animal for a shot. The best macro photographers are also the calmest divers, and it shows in their images.
Getting your color back
Even with a captured white balance and good light, macro files reward a gentle edit — a nudge of white balance, a little contrast, and the color is there. Our guide to the best underwater photo editor compares the tools, and how to restore underwater photos walks through the methods. For a one-tap route on your phone, our app JellyFix restores underwater photos on-device, and you can see the kind of color that comes back in the before-and-after gallery. For more on the science of why the color goes in the first place, see why underwater photos look blue.
For more, browse the camera guides and the rest of OceanDimana.
Field notes
Frequently asked questions
How do I get sharp underwater macro photos?
Where should I focus in underwater macro?
Why are my macro photos blurry even when the camera confirmed focus?
What is the best angle for underwater macro?
How do I get the black-background macro look?
How close should I get to a macro subject?
What camera is best for underwater macro?
Do I need a strobe for macro?
Underwater color science
Continue Learning
OM System TG-7 Underwater Guide
The classic entry-level macro camera — its Microscope mode, settings, housing, and wet lenses.
Read moreNudibranchs: A Diver's Guide
The most photogenic macro subjects in the sea, and how to find and shoot them.
Read moreFrogfish: A Diver's Guide
Masters of camouflage and a macro favorite — what they are and where to look.
Read moreHow to Restore Underwater Photos
Bring natural color back to your macro files, from in-camera technique to AI.
Read moreBest Underwater Photo Editor
Compare Lightroom, Photoshop, Capture One, and AI editors for underwater work.
Read more